


TRINITI

- TRINITI
- VISATON
3 Way Transmission Line Floor Standing, 1x KE25SC and 6x TI100 #5994. (Pair) Special Ordered Item, Not Actually in Stock.
Six TI 100 - 8 Ohm and one KE 25 SC - 8 Ohm built into a hybrid cabinet design that combines horn and transmission line principles. In many respects, this is something special, something different. The development effort involved was particularly great. There has seldom been a project that required so much rebuilding and intensive optimisation. The development of the crossover was most complicated of all because there is powerful interaction in the bass department with the damping, so with each new configuration both had to be adjusted to match. The construction of these cabinets is aimed at particularly skilled cabinet builders, which is why we would emphasise that building them is a matter for DIYers with plenty of experience, this is not a good project for first-time builders. Alternatively, you can always commission a professional cabinet maker. The wiring is also not exactly a piece of cake, due to the sheer number of drivers used, but it can be mastered if you have a grasp of the basics.
Anyone with the confidence to attempt construction of this loudspeaker will be richly rewarded, in terms of both the visual appearance and the acoustic presence. Despite the impressive height of the speakers, the narrow front panel communicates a tremendous lightness – far more so than one would expect, given the sheer dimensions of the cabinets.
The hollow base of the cabinet houses the crossovers and raises the tweeter to the on-axis plane. The spacing of the drivers not only optimises the function of the cabinet but also assures a pleasantly harmonious appearance, while approaching a D’Appolito configuration.
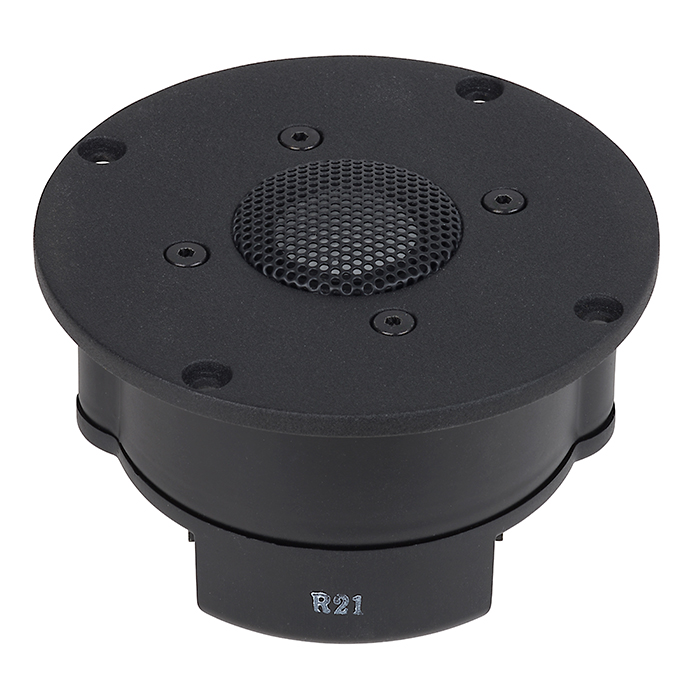
Four of the 8 ohm TI 100 are exclusively assigned to the bass frequencies. With a total diaphragm area of the drivers equivalent to 20 cm, there is no need to worry about dynamic reserves and level accuracy. A further two 8 ohm TI 100 act as pure mid-range drivers, while the 8 ohm KE 25 SC dome tweeter takes up the central position both physically and acoustically. To prevent interference between the coils, the crossover has been split across two PCBs that are physically separate from each other. By connecting the mid-range speakers in series it has been possible to configure this branch without any resistances to balance the levels; only the tweeter requires a little restriction. The system has been designed using only essential components and, with the exception of the bass branch, it has been possible to dispense with remedial branches, which means the component requirements are on the modest side for a three-way speaker.
The separating frequency between the high and mid-ranges has been set at 2100 hertz, which is so low that, in conjunction with the slope rate of the 3rd order filter (18 dB filter), the baffle resonance levels of the 8 ohm TI 100 have no negative effects. Thanks to the highly linear sound pressure and impedance frequency response of the 8 ohm KE 25 SC ceramic dome driver, it is possible to create the link using a deliberately minimalistic 12 dB filter, allowing the driver to respond with the superb characteristics it was designed for. Also, by separating the mid-range and bass frequencies at a low 180 hertz, the designers have achieved a situation where the locatable frequencies emanate almost exclusively from the drivers for the mid- to high-range group that are close together. Furthermore, the tendency for bass horns to resonate in the mid-range has been minimised by filtering the critical frequencies through the crossover, so they are hardly excited at all in the horn. As a result, it has been possible to reduce the necessary damping considerably compared with a higher separation level, which benefits bass reproduction.
The pure reference-standard sound, without the slightest distortion, the fidelity of detail and clarity are breathtaking. Resolution of this quality is difficult to beat – every last detail is heard, nothing is suppressed or drowned out. But this does not mean that the details are obtrusive or heavy-handed, they are merely there. It may sound contradictory that the finest details are reproduced in the overall sound package but can still be overheard. It does require an active listening effort to detect them, quite simply because they are not artificially boosted or forced into the foreground but are rather presented to the listener in the best way as a perfectly natural component. On the other hand, it is not necessary to exert oneself excessively to pick up these nuances, they are audibly present and not just implied. This means that even very long listening sessions are not the slightest bit tiring. Vocals come across tangibly and seamlessly. Poor quality recordings are instantly detectable as such even for less well-trained listeners. There is no detectable colouration, the sound properties are analytical but not cold.
High frequencies are clear, fast and accurate but never intrusive or excessive. If the recorded material is the result of good mastering, it will shine and sparkle when it is supposed to and can easily cause waves of goose-pimples.
The dry, deep bass is surprising; the narrow cabinet and relatively small bass driver do not look capable of generating such a presence.
However, the bass is not thick or overpowering, it is precise and well-defined and is a refreshing rest from those boomy boxes that are currently so high on the best-seller lists.
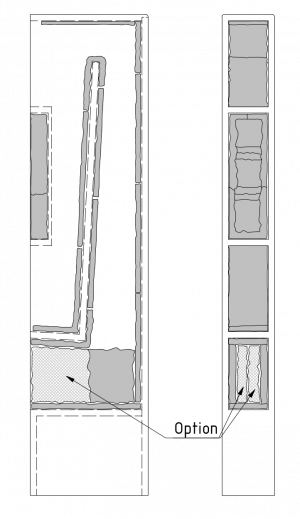
The TriniTI should, however, never be underestimated. It is well able to move large quantities of air. When instructed to do so, the four 8 ohm TI 100 can project an unbelievable amount of deep bass energy into the listening area. Discerning listeners can experiment with the optional damping mats in the opening of the horn to fine-tune the bass to their personal tastes and the room. If one relies on the measurements, the best version is one in which the two optional pieces are inserted in the horns, but in our listening tests in the listening room we preferred the version without this option.
The level accuracy was a further surprise: the limit is well above volumes we would term "home use". It is particularly noticeable that the overall sound quality remains completely stable and effortlessly uniform across the full range from loud to quiet. As a result, dynamic leaps are reproduced faithfully and the stage does not collapse when things get a bit heavier. The TriniTI will always respond in a relaxed, measured way and present its maker with exactly the acoustic nourishment that is fed into it. To the detriment of neighbourly relations, there is a tendency to turn up the volume control, simply because the speakers show that they can take it. However, their strength definitely lies in their clarity and resolution. One seldom experiences loudspeakers that are as neutral as these, whose complete range of reproduction and volume levels always remains so well-balanced and yet is so incredibly responsive. Their precision and ability to produce result in tremendous satisfaction while never resorting to excesses or irritation. This means one can enjoy music at low volume levels but equally well at high volume levels. These loudspeakers are quite simply enormous fun.
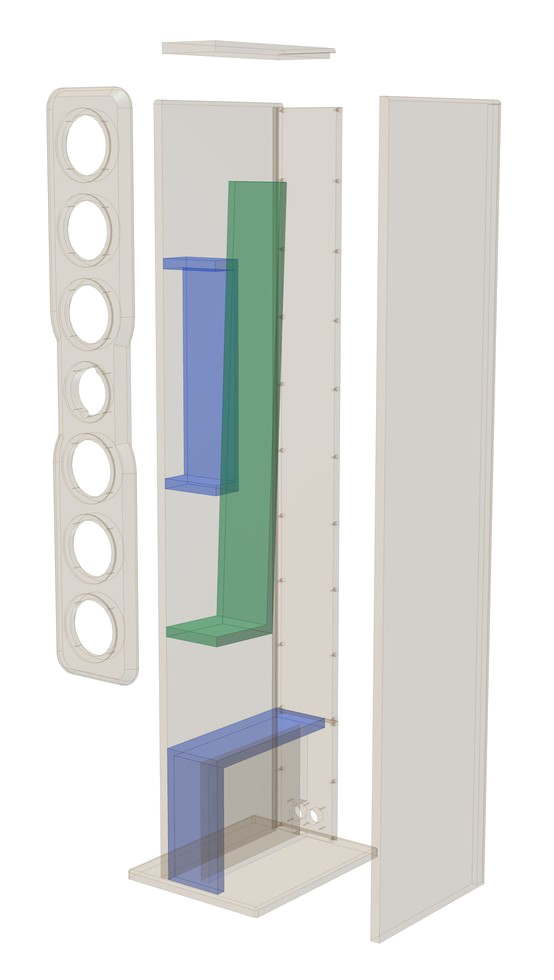
Assembly
First glue the L-shaped divider sections at right angles (168 x 122 mm and 832 x 122 mm), glue the dividers of the mid-range enclosure (55 x
122 mm) to the corresponding 10 mm rear panel (425 x 122 mm), the floor (322 x 122 mm) and the front section of the base (263 x 122 mm).
The base and PCB holder can be completely glued together.
Drill a hole in the rear wall of the mid-range enclosure big enough for two double-strand cables. With the speaker standing upright, this hole should be near the dividers of the mid-range enclosure. When selecting the hole position, be sure to consider the installation depth of the mid-range drivers. Then drill a hole in the shorter part of the L-shaped divider for three wires and in the middle of the base.
Glue the mid-range enclosure, the L-shaped divider, base, front base section and cover to the side panels. With the mid-range enclosure, cover and L-shaped divider, it is essential to ensure that they are exactly flush with the front so that the front panel can later be mounted flush and airtight on all sides. When attaching the base and front base section, ensure the glued parts are flush with the rear rebate.
Now pass the cables for the mid-range drivers and the tweeter through the hole in the mid-range enclosure and the cables for all three sections through the L-shaped divider and the base. Note here that the mid-range drivers must be connected in series and the woofers in parallel or in series. The holes must be well sealed afterwards.
Hot-melt glue is recommended for this task.
Now cover the fabric frame with the fabric and attach the front. You can use such solutions as tongue and groove or dowels or it can be glued over the entire surface. What is crucial is that all the surfaces are fully airtight.
The inner damping is now inserted into the cabinet in accordance with the following instructions.
Now glue the sealing tape into the rebate or onto the back wall.
Solder the chassis, crossovers and terminal and screw them firmly in place. Position the low-frequency crossover with the LR coil as close as possible to the terminal on the right side of the base (viewed from the front). Fasten the mid-range/tweeter PCB with the large SP coil close to the base and as far towards the front as possible. Now screw the fabric frame to the front of the base from the inside. Finally, screw the terminal, base and rear panel together.
Inner damping
Horn damping
In contrast to most other kits, which also allow for larger deviations from the damping arrangement, this kit requires very close adherence to the prescribed damping layout. This is why the back has been designed to be removable.
Using scissors, cut two mats of damping material into 5 equal strips of 12 x 33 cm each, and from the third mat cut three more strips of 12 x 33 cm each and three strips of 5.5 x 33 cm each. The fourth mat will be cut to size later. We recommend fixing each strip at the ends and, if necessary, in the middle, with a manual staple gun. No additional fixing is necessary. Due to the very cramped conditions inside the cabinet, using a staple gun is often difficult, so attaching with double-sided adhesive tape, spray-on adhesives, nails, etc. may be suitable alternatives. However, it must be ensured that the mats will never be able to slip. The use of other damping wool is also very critical and is therefore not recommended. The strips of damping do not have to be stretched, compressed or shaped, they are simply loosely positioned and fixed in place.
Line the back wall over the entire length with the damping strips (approx. 3.5 strips). When fitting the rear panel, make sure that no damping material gets into the rebate, and if necessary cut the strips a little narrower. The same applies when determining the length. Now line the bottom of the horn opening with a strip. Also completely line the L-shaped divider with six strips. It is best to start at the horn opening and place one strip after the other end-to-end. If the last strip is too long, it can be shortened to the appropriate length. The cavity behind the mid-range/tweeter enclosure is very difficult to line, but it must be ensured that the strips cannot slip. It is also possible to connect two strips to form one long strip using an office stapler or by sewing them together. Attach another strip to the lid of the cabinet. This piece must be fixed in the centre (exactly vertically above the divider) in such a way that this strip can never slip, which would block off the tube. Now line the bottom of the horn opening with another strip.
Cut one mat into three strips of approx. 17 x 33 cm. Two strips will cover the sides of the horn opening. The remaining strip can be halved and inserted into the horn opening as an option.
Inner damping for the mid-range section
Fully line the rear wall of the enclosure with a strip and the remainder of the mat used on the removable rear panel. Any overhanging insulation material can be cut off. Now line the side walls of the mid-range enclosure with the three 5.5 x 12 cm strips. Gentle stuffing is recommended. Cut four pieces of approx. 6 x 6 cm from the remaining strip of damping material and fill the hollow area between the tweeter and the openings for the mid-range drivers with two pieces each. When the mid-range drivers are positioned, they will now be completely surrounded by damping material. If any damping material is left over, an additional layer can be added behind the tweeter.
Component parts list for 1 box
The kit includes all the components listed here but not the cabinet.